 I know, this first thing you thought about when you woke up today was the size of the images on your website, right? Or maybe that was just me …
Regardless of how off the radar this topic may be for you, it’s an important one because image file size (KB, MB, GB) can affect site speed, which in turn has a direct impact on your SEO.
The good news is that if you have a WordPress site, there are plugins that can help you optimize image file size automatically.
How Image File Size Works
Every time you load an image to your website it has a certain file size, which is different than how big your image is on you site. The bigger the file size (typically in KB or MB), the longer the image takes to render on your site.
So, for instance, if you had professional team member photos taken and the actual file size of each image is a minimum 5MB, that’s fine if you’re going to print the photos, but it’s bad news if you place photos that big on your website.
Image Optimization Software
Enter the image optimizer, which can automatically lower the overall footprint of each image’s file size. We typically use an image optimizer called Short Pixel, but there are others out there. What’s nice about Short Pixel is that the cost is low, and it works in the background so you don’t have to worry about it.
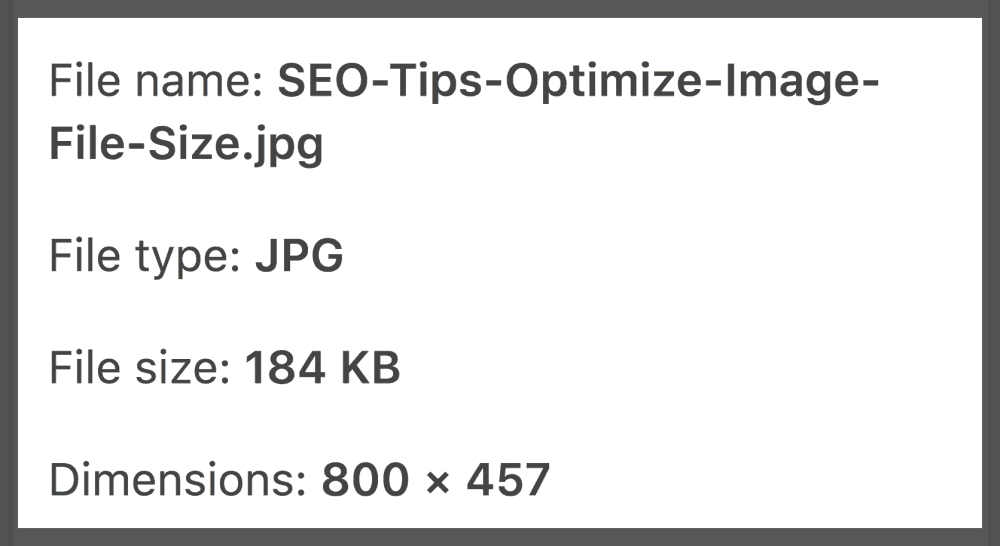
Here’s an example of how it works
The file size of my image for this blog post (before I ran it through Short Pixel) was 184KB …
The file size was reduced 62.61% once it was processed …
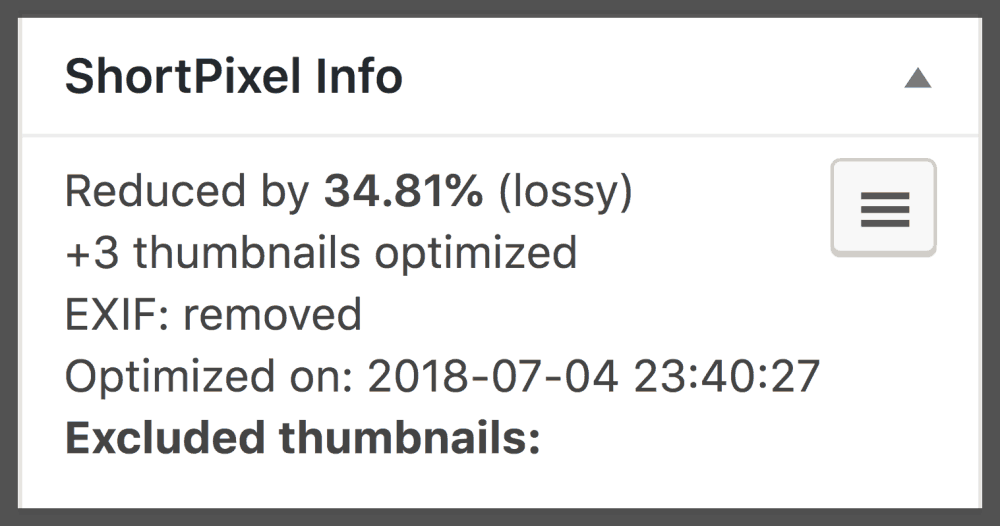
Nice right?
This results in faster load time which provides a better user experience for your visitors. Google also likes fast load time and will give you an SEO bump when they see your site is fast (for more on this check out our article The Need for Speed: Improving Your Website’s Page Load Time).
Lossy vs. Lossless
There are two major options when setting up your image optimization software:
- Lossy compression: this provides the highest compression rate, which means it makes your image file size as small as possible while still looking good. According to applications like Short Pixel, “this is the recommended option for most users, producing results that look the same as the original to the human eye.” This is what we typically use to reduce image file size.
- Lossless compression: this provides a compressed image that is “pixel-identical” with the original image — so no image quality is lost. As you can imagine, this option does not minimize the footprint of your image as much as lossy — which means load time could be higher with lossless.
Note: We’ve found that if there is text in your imagery (as with a screenshot of a web page), lossy compression makes the image look blurred and pixelated. Definitely review your images once you’ve processed them to make sure they look good on a high-resolution display (Lille a MacBook Pro retina display or an iPad). And if your image is text heavy (like the screen shots on our Web Design Gallery page), it might be better to set your compression to lossless before uploading.
Optimized file image size is an all-around win for your website — bringing a better user experience to visitors and making Google happy too!
Want more tips and insights from Cuppa SEO?